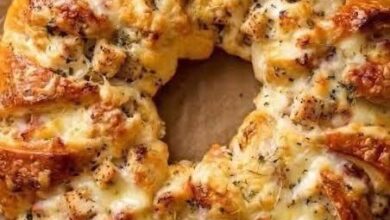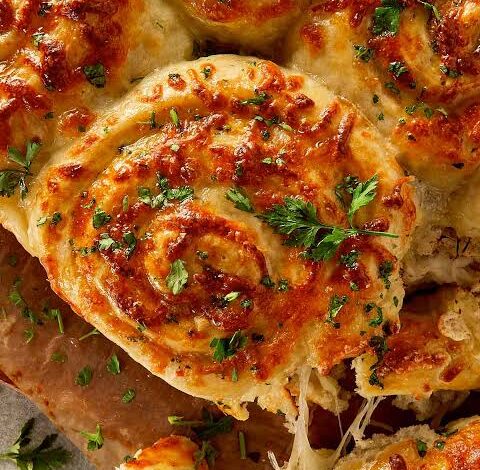
Imagine walking into a warm kitchen filled with the undeniable, comforting aroma of freshly baked bread mixed with rich garlic butter and melting cheese. This Cheesy Garlic Rolls recipe brings that exact cozy, restaurant quality experience directly into your own home without any hassle. At its core, this dish takes soft, pillowy dough and combines it with a generous filling of savory garlic, fragrant herbs, and gooey, pull apart cheese. Whether you are an experienced home baker or someone who has never touched yeast before, this recipe is designed to be completely approachable, reliable, and ridiculously delicious for everyone.
People around the world are absolutely obsessed with this recipe because it hits every single comfort food craving in a single bite. There is something truly magical about tearing open a fresh, hot roll and watching warm mozzarella cheese stretch endlessly while the golden brown crust offers just the right amount of soft crunch. Unlike basic garlic bread that can sometimes turn overly greasy or dry out quickly in the oven, these rolls stay incredibly soft, fluffy, and moist inside. They deliver a bold, savory flavor profile that satisfies children and adults alike, making them a universal crowd favorite at literally any table.
You should consider making these garlic rolls whenever you want to bring people together, celebrate a special moment, or simply pamper yourself after a long and exhausting week. Cooking and baking can be deeply therapeutic, and kneading smooth dough by hand or watching it rise in a cozy bowl offers a wonderfully grounding, joyful emotional break from busy modern life. Beyond pure emotional comfort, these rolls are extremely versatile because you can easily tweak the ingredients to suit your personal fitness goals, such as swapping in whole wheat flour or using lighter cheese options without sacrificing flavor.
This ultimate comfort food works wonderfully as an irresistible appetizer for game nights, a cozy side dish for hearty pasta dinners, or even a star attraction at family holiday gatherings. Preparing a fresh batch fills your house with an inviting scent that makes everyone instantly hungry and brings smiles before the food even hits the table. Serving warm, homemade bread to your loved ones creates fond memories centered around shared meals and vibrant conversation, proving that simple ingredients combined with a little love can elevate an everyday meal into a memorable feast.
Ingredients You Will Need
For the Soft Roll Dough
-
3 cups all purpose flour or bread flour
-
1 packet active dry yeast, which is about 2 and 1 quarter teaspoons
-
1 cup warm whole milk, kept at around 110 degrees Fahrenheit
-
2 tablespoons granulated sugar
-
1 large egg at room temperature
-
4 tablespoons unsalted butter, softened at room temperature
-
1 teaspoon fine salt
For the Cheesy Garlic Filling
-
1 and a half cups shredded low moisture mozzarella cheese
-
half cup shredded sharp cheddar cheese or grated parmesan cheese
-
6 tablespoons unsalted butter, melted
-
4 cloves fresh garlic, finely minced or crushed
-
2 tablespoons fresh parsley, finely chopped
-
1 teaspoon dried Italian seasoning
-
half teaspoon garlic powder
-
half teaspoon red pepper flakes, optional for a bit of mild heat
For the Garlic Butter Topping
-
3 tablespoons unsalted butter, melted
-
2 cloves fresh garlic, minced
-
1 tablespoon fresh parsley, finely chopped
-
2 tablespoons grated parmesan cheese
Step by Step Method
Step 1: Activate the Yeast
Start by taking a clean, large mixing bowl and pouring in your warm milk. Make sure the milk is warm to the touch but not boiling hot, because hot liquid will kill the yeast. Add the granulated sugar and sprinkle the active dry yeast evenly over the top of the warm milk. Gently stir the mixture once with a spoon and let it sit quietly on your counter for about 5 to 10 minutes. During this time, the yeast will begin to feed on the sugar and form a thick, frothy, bubbly layer on top of the liquid. If the liquid does not get bubbly after 10 minutes, your yeast might be old, so you should throw it out and start fresh with a new packet.
Step 2: Mix the Dough
Once your yeast mixture is frothy and active, add the room temperature egg, softened butter, and fine salt into the bowl. Whisk these wet ingredients together until they are well combined. Next, begin adding your flour slowly, about one cup at a time, stirring continuously with a sturdy wooden spoon or a spatula. Keep adding flour until a soft, sticky dough starts to form and pulls away from the sides of your mixing bowl. If the dough feels way too sticky to handle, you can add an extra tablespoon or two of flour, but try not to add too much because a softer dough makes a fluffier roll.
Step 3: Knead Until Smooth
Turn the soft dough out onto a lightly floured, clean countertop or large cutting board. Using the palms of your hands, begin kneading the dough by pushing it forward and then folding it back over itself. Continue this rhythmic kneading process for about 8 to 10 minutes continuously until the dough becomes silky smooth, elastic, and springy. You can test if the dough is ready by gently poking it with your finger; if the dent bounces back slowly, your dough is kneaded enough. Grease a clean, large bowl with a little oil or butter, place your smooth dough ball inside, and turn it over once so all sides are lightly coated.
Step 4: The First Rise
Cover your bowl tightly with a clean kitchen towel or plastic wrap to trap the moisture inside. Place the covered bowl in a warm, draft free area of your kitchen, such as inside an turned off oven with the light on, or near a warm window. Allow the dough to rest undisturbed for about 1 to 1 and a half hours, or until it doubles in size dramatically. This resting period is critical because it gives the yeast time to produce gas bubbles, which creates that airy, light texture everyone loves in homemade baked bread.
Step 5: Prepare the Filling
While your dough is rising peacefully, you can make the rich garlic filling. In a small bowl, melt the butter for the filling in your microwave or on the stove. Add the minced fresh garlic, garlic powder, dried Italian seasoning, chopped fresh parsley, and red pepper flakes if you are using them. Stir everything together until the garlic and herbs are evenly mixed throughout the liquid butter. In a separate medium bowl, mix together the shredded mozzarella cheese and sharp cheddar cheese so they are ready when you roll out your dough.
Step 6: Roll Out and Assemble
When your dough has doubled in size, gently press your fist into the center of the dough to release the trapped air bubbles. Transfer the relaxed dough back onto your lightly floured countertop. Using a rolling pin, roll the dough out evenly into a large rectangle shape, roughly 12 inches by 16 inches in size. Use a pastry brush or spoon to spread the seasoned garlic butter mixture evenly over the entire surface of the rolled out dough, leaving a small half inch border along the edges. Scatter the mixed shredded cheeses evenly on top of the buttery surface.
Step 7: Shape the Rolls
Starting from the long edge closest to you, roll the dough up tightly away from you, creating a neat, long log shape filled with cheese and garlic butter. Pinch the long seam closed at the end so the roll holds its shape tightly. Using a sharp serrated knife or a piece of plain dental floss slipped under the log, slice the log into 12 equal, thick pinwheel slices. Place these individual rolls side by side in a well greased 9 by 13 inch baking dish, leaving a tiny bit of space between each piece so they have room to expand.
Step 8: The Second Rise and Bake
Cover the baking dish loosely with your towel and let the shaped rolls rise a second time for about 20 to 30 minutes until they look noticeably puffy. While they do their final rise, preheat your oven to 375 degrees Fahrenheit, which is about 190 degrees Celsius. Once the oven is fully preheated, place the baking dish into the middle rack and bake for about 20 to 25 minutes. You will know they are finished when the tops turn a stunning golden brown color and the melted cheese is bubbling enthusiastically around the edges.
Step 9: Garnish and Serve Warm
As soon as you pull the hot rolls out of the oven, prepare your final topping. Mix the melted butter, minced garlic, fresh parsley, and grated parmesan cheese together in a tiny dish. Brush this vibrant, savory garlic butter mixture generously all over the tops of the hot, steaming rolls. Allow the rolls to cool down for about 5 minutes so the cheese settles slightly, then pull them apart and serve immediately while they are delightfully hot and stretchy.
Why This Recipe Is Special
This Cheesy Garlic Rolls recipe stands out from basic bread recipes because it strikes an ideal balance between amazing taste, simple home cooking techniques, and rich texture. The double rising process ensures that every single bite yields a tender, melt in your mouth texture that retains its airiness even after cooling. Incorporating both minced garlic and garlic powder guarantees a well rounded, robust savory punch without any sharp raw garlic bite, while combining mozzarella with cheddar or parmesan gives you both maximum cheese stretch and deep flavor complexity.
From a wellness perspective, making your own bread at home allows you complete control over every ingredient going into your body. Commercial store bought garlic bread often relies on heavy preservatives, artificial flavors, hydrogenated oils, and hidden sugars to extend shelf life. By contrast, this homemade version uses real whole milk, fresh eggs, authentic butter, and raw garlic. Fresh garlic is famous for containing allicin, a natural compound known to support immune health and lower inflammation, while fresh dairy provides natural calcium, protein, and essential healthy fats.
Additionally, this recipe is incredibly adaptable for diverse dietary needs, making it feel extra inclusive for family cooking. You can effortlessly switch out dairy products for plant based milk and vegan cheeses if you are lactose sensitive, or swap in gluten free flour blends to cater to sensitive stomachs. Because you are crafting these rolls from scratch, you can easily control the sodium levels and decide exactly how rich or light you want your final dish to be, offering a perfect mix of wholesome homemade comfort and guilt free flexibility.
Extra Tips for Better Taste
-
Use Fresh Garlic: Always use fresh garlic cloves rather than pre minced garlic in a jar, because freshly crushed garlic yields a much sweeter, brighter, and more potent flavor profile.
-
Warm Milk Temperature: Ensure your milk is comfortably warm to the touch, ideally between 100 and 110 degrees Fahrenheit, as cold milk slows down yeast growth while hot milk destroys yeast entirely.
-
Floss Cutting Method: Slide unflavored dental floss under your rolled log of dough, cross the ends over the top, and pull firmly to slice clean rolls without squishing the fluffy layers.
-
Grate Your Own Cheese: Buy block mozzarella and cheddar cheese and shred them yourself at home, because pre shredded packaged cheese contains anti caking powders that stop it from melting super smoothly.
-
Add a Spicy Kick: Mix a small pinch of fresh jalapeno slices or extra red pepper flakes into the cheese layer if you enjoy a warm, spicy contrast to rich butter and cheese.
-
Brush with Butter Twice: Brushing garlic butter both before baking and immediately after taking the hot rolls out of the oven locks in ultimate moisture and guarantees maximum aroma.
-
Reheating Leftovers: Reheat leftover rolls in a 350 degree oven for 5 minutes or wrap them in a damp paper towel and microwave for 15 seconds to make them soft and pillowy again.
Final Thoughts
Baking a fresh tray of these Cheesy Garlic Rolls is truly one of the most rewarding simple pleasures you can enjoy in your home kitchen. From the calming process of working with soft dough to the incredible reward of pulling apart a warm, golden, cheese filled roll, every step brings genuine joy. This recipe proves that you do not need fancy equipment or hard to find ingredients to create spectacular comfort food that rivals your favorite Italian restaurant. Gather your ingredients, enjoy the creative process, and get ready to share these irresistibly warm, garlic scented rolls with the people you love most.
Nutrition Details
Below is an estimated nutrition breakdown per individual roll based on a full recipe yield of 12 equal rolls.
Nutrition Table Per Serving
| Nutrient | Amount Per Serving |
| Calories | 265 kcal |
| Total Fat | 14 g |
| Saturated Fat | 8 g |
| Trans Fat | 0 g |
| Cholesterol | 45 mg |
| Sodium | 380 mg |
| Total Carbohydrates | 26 g |
| Dietary Fiber | 1 g |
| Total Sugars | 3 g |
| Protein | 8 g |
| Calcium | 140 mg |
| Iron | 1.5 mg |
Disclaimer
Please keep in mind that everyone’s body, health conditions, nutritional needs, and metabolic responses are unique. The nutritional values provided in this article are simple estimates calculated using standard ingredient databases and may vary based on specific brand choices or preparation methods. If you have specific dietary restrictions, allergies, or underlying medical conditions, please consult with a qualified doctor or certified nutritionist before making major dietary adjustments.